Posts

Showing posts from October, 2010

BaCk iN aCtIoN....

Image
Just a quick blog to show everyone what I've been up to as far as my scrapping world goes..... considering most of my stash and tools are in the container still en-route from Australia to Canada..........   They're all going onto e-bay, and I'm hoping I'll get some new clients, as wonderful as my clients I had in Australia!!!!  Miss you ladies, and especially my crazy scrapping buds from Geelong!!!!! Take care, and have a great weekend everyone!!!!

hAvInG wItHdRaWaLs

Image
I think I'm having major withdrawal symptoms here, not being able to scrap with our move happening early next week.  I've packed all my precious supplies up and sitting on my hands......  trying to tie up all those precious moving "have to do's"......  This is going to be my last blog while we're here in Australia, I'll post something from Canada next....  Probably a "snow page..."!  Once my stash arrives that side......  Aaaaaannnnyway, I thought I'd just quickly share one of the last pages I did for e-bay before I packed up my stash.... can't remember if i've added these two below yet....  oh well, if i did, sorry! Till later! b

FiRsT sTeP bY sTeP

Image
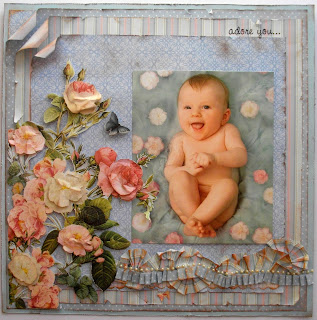
Adore You… Layout Step By Step I have used 6 sheets of Grant Archival  paper in this layout, (from Big W) A self adhesive string of pearls, Double sided tape 3D mounting blocks Brown mini inking pad Paper trimmer, craft knife, scalloped scissor and scissors 1. Choose the 4 sheets of background paper you wish to use in the layout, and trim and distress the edges. I have used the plain blue for the bottom layer, I have used an edge distresser, but you could also use the blade of your scissor. Once the edge has been distressed to your liking, rub the edges of your page with your brown mini ink pad until desired effect is acquired. 2. Trim the second bottom page (I used the blue and white dots) by half an inch on two sides. Distress and ink as you did with the previous page, as above. 3. Trim the third layer (I used the pink and blue striped paper) by an inch on two sides. Distress and ink as with the previous two pages. 4. Trim the top background page by t...

JuSt SoMe MoRe FoR sAlE

Image
My boys were, and still are crazy about Lion King!  Well, me too!!! I thought this layout would look so great with a 5x7" photo of dad and all the kids!  Dad's Pride and Joy...  for sure! I absolutely love how this one turned out....  Romantic and airy fairy.... This one is kinda rustic ...  I thought it would look great with some farm pics, or even horse riding..... definately boys....... there's space for 3 photo's and the top will look great with a good title in wood, or even the Kaiser felt letters....   some journaling at the bottom..... This one has got wooden embelishments from K&Company..... I love every thing about K&Company, they have really stylish stuff!! I like that the little wooden birds and sign are now a bit different to the usual twidlybits stuff, they're a new twist on add-on's....  I think they're going to be really popular... What can I say about Tinker Bell and friends?  ...